Step 1: Navigate to Trust Center
Click on Settings from your account
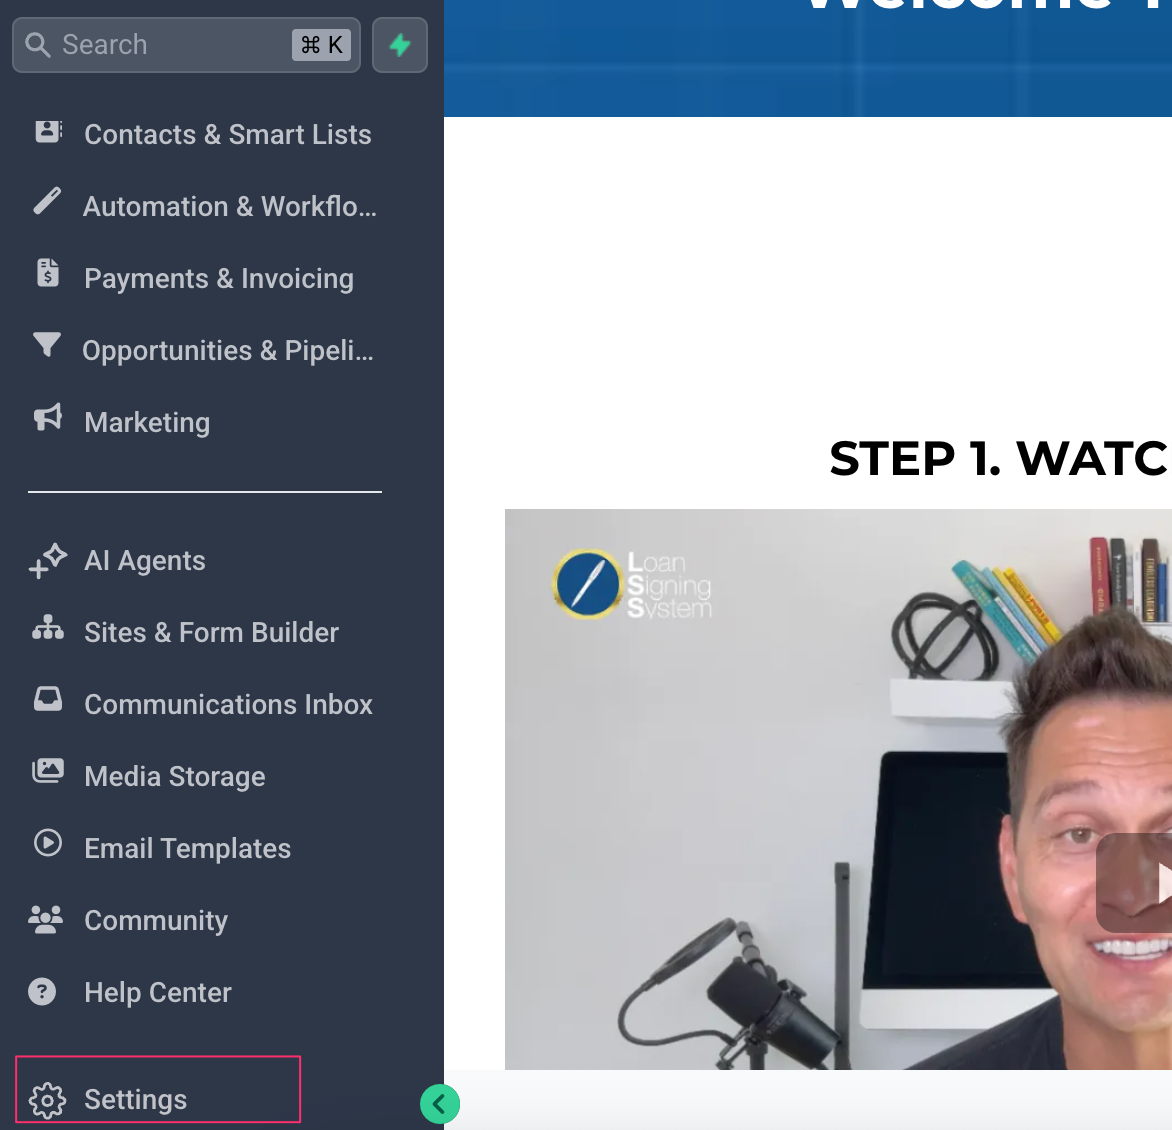
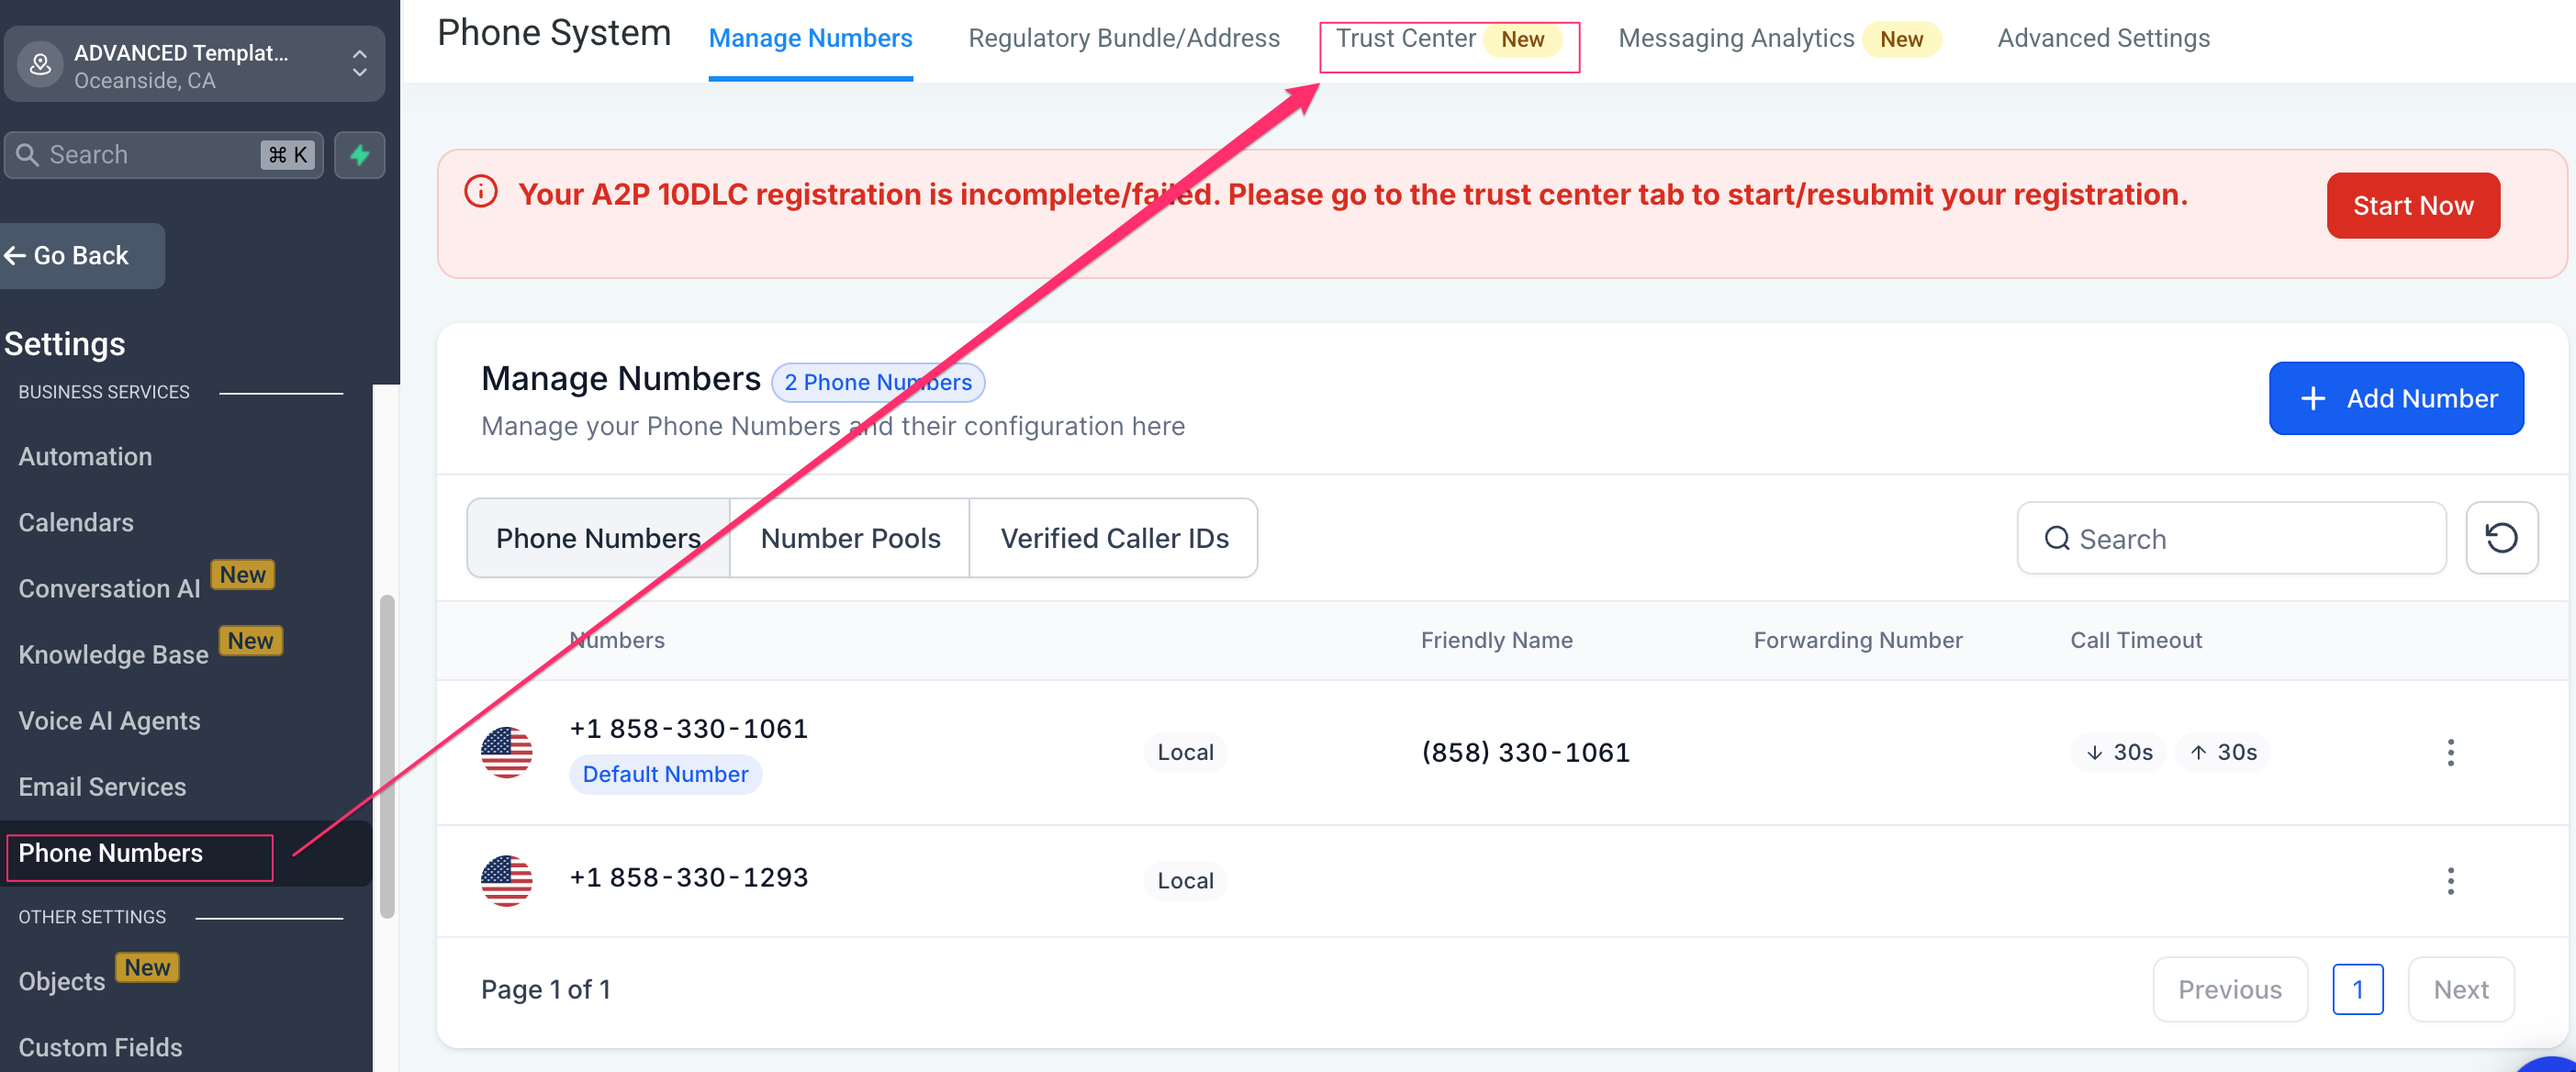
Select Phone Numbers under Business Services. Click on the Trust Center tab.
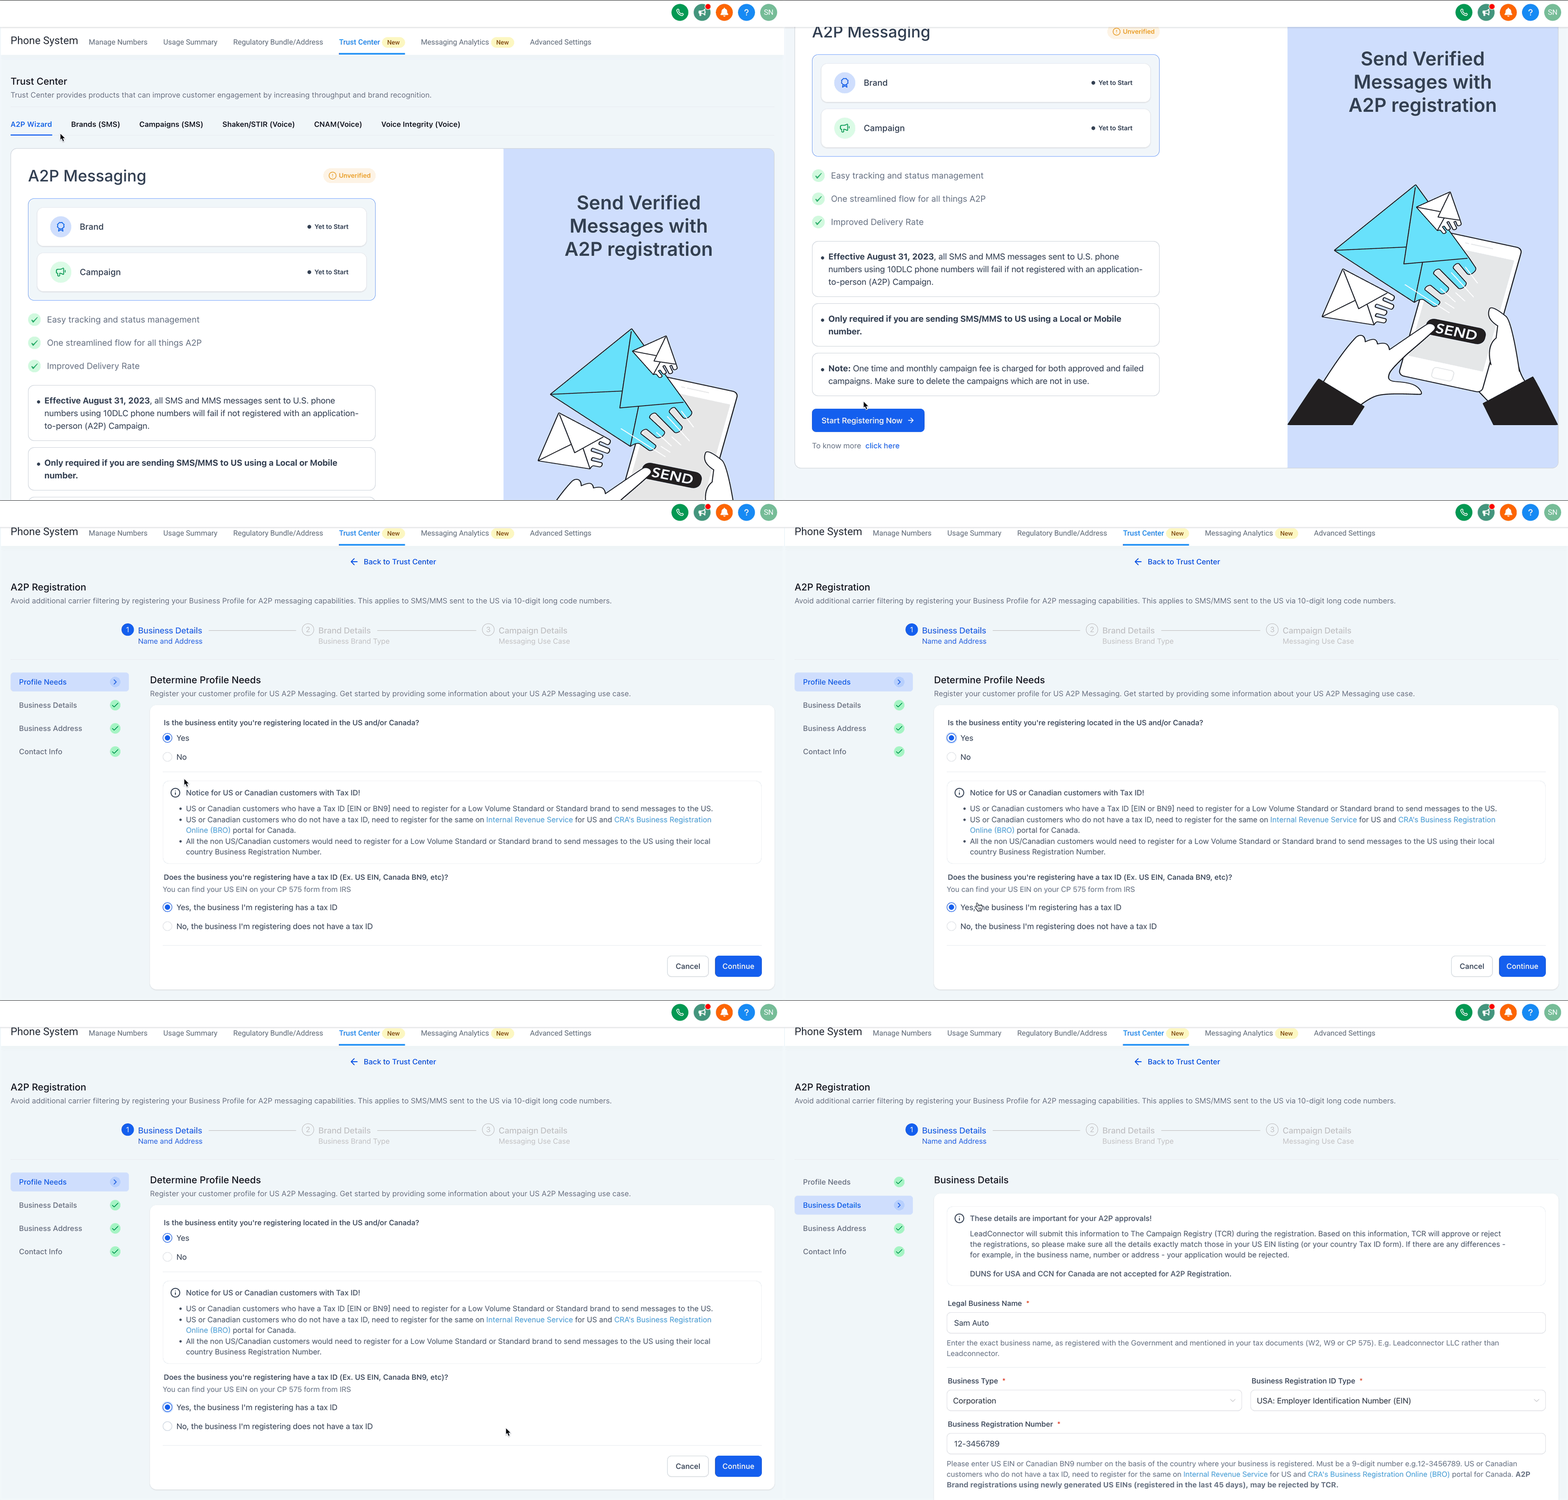
Click on the Start Registering Now button under A2P Wizard tab.
Select Yes for 'Is the business entity you're registering located in the US and/or Canada?' option.
Select 'Yes, the business I'm registering has a tax ID' option.
Click on Continue.
Enter Legal Business Name as registered with the Government and mentioned in your tax documents (W2, W9 or CP 575). E.g. Leadconnector LLC rather than Leadconnector.
Enter your Business Type from the list.
Choose your Business Registration ID Type from the list.
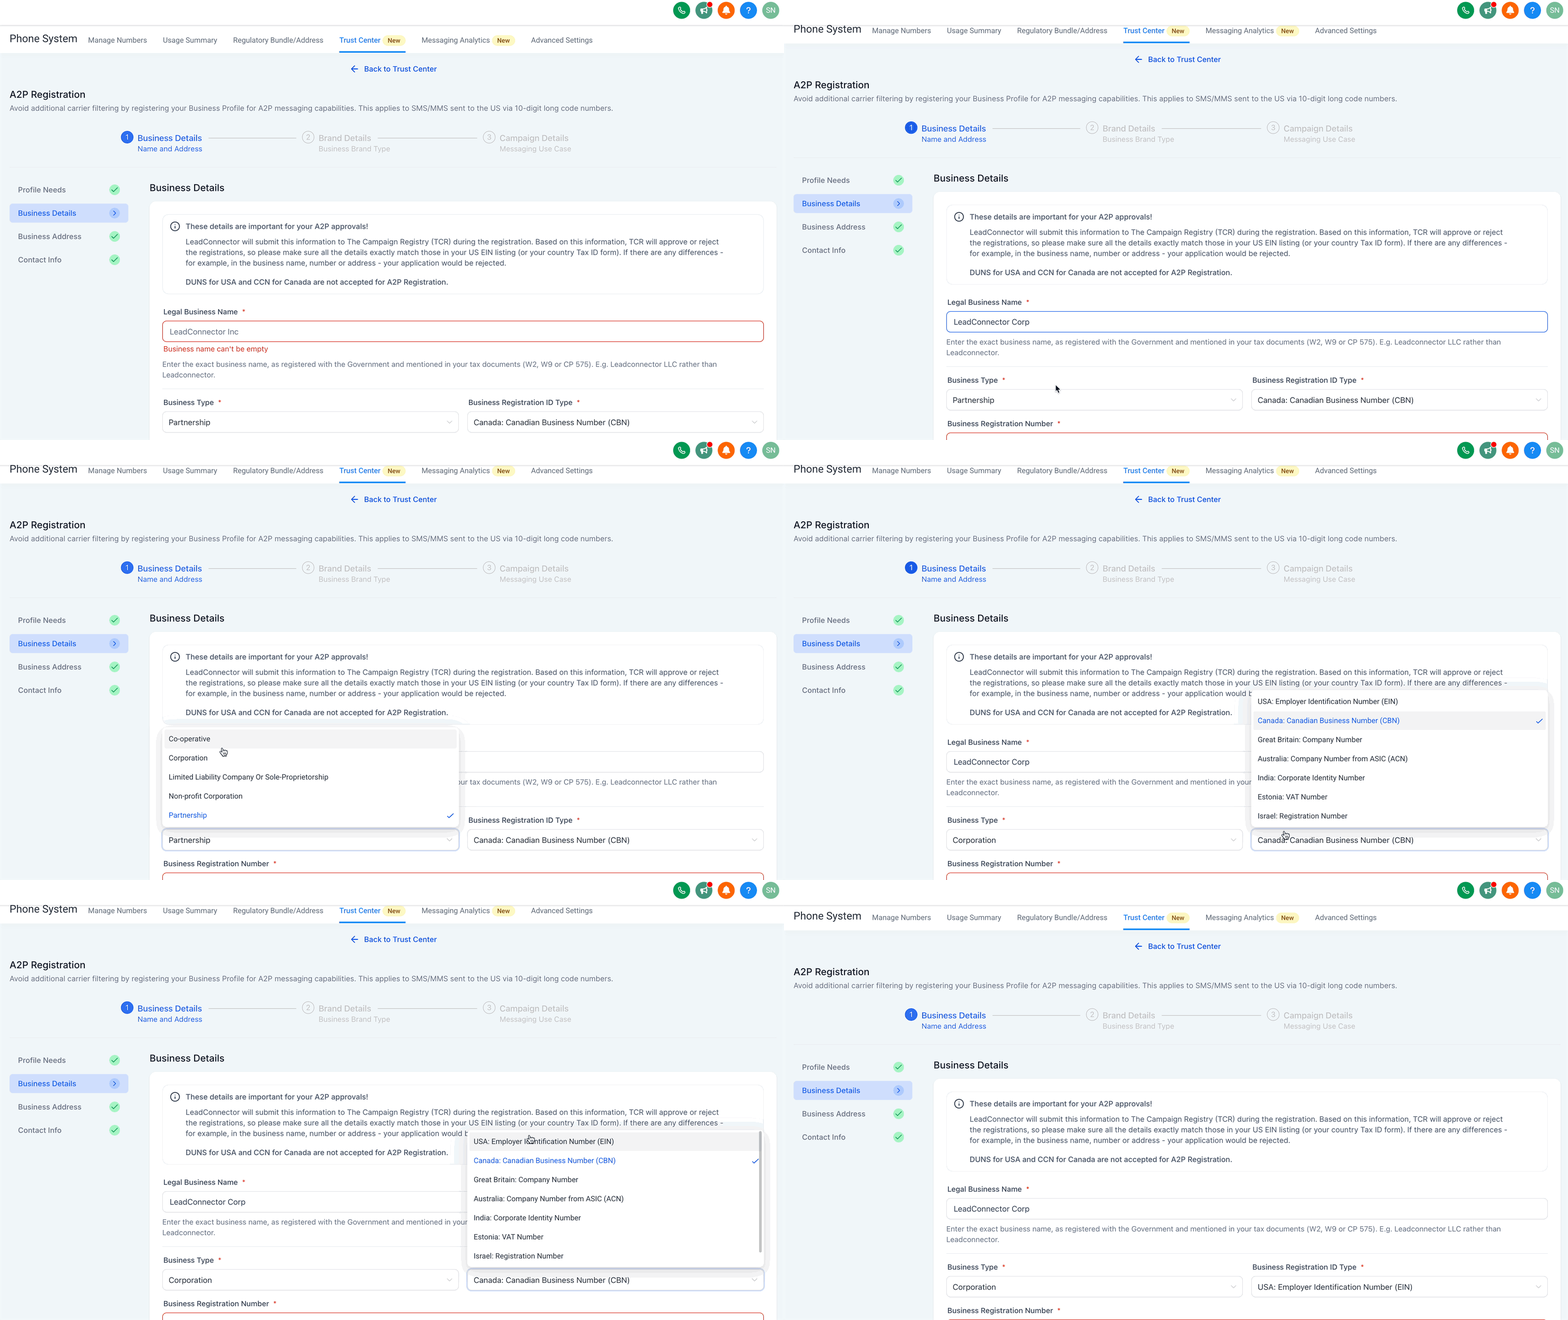
Enter your Business Registration Number as per your country.
Select your Business Industry from the list of available industries.
Enter your Business Email.
Add your Website URL.
Select your Business Region of Operations from the list.
Click on Continue.
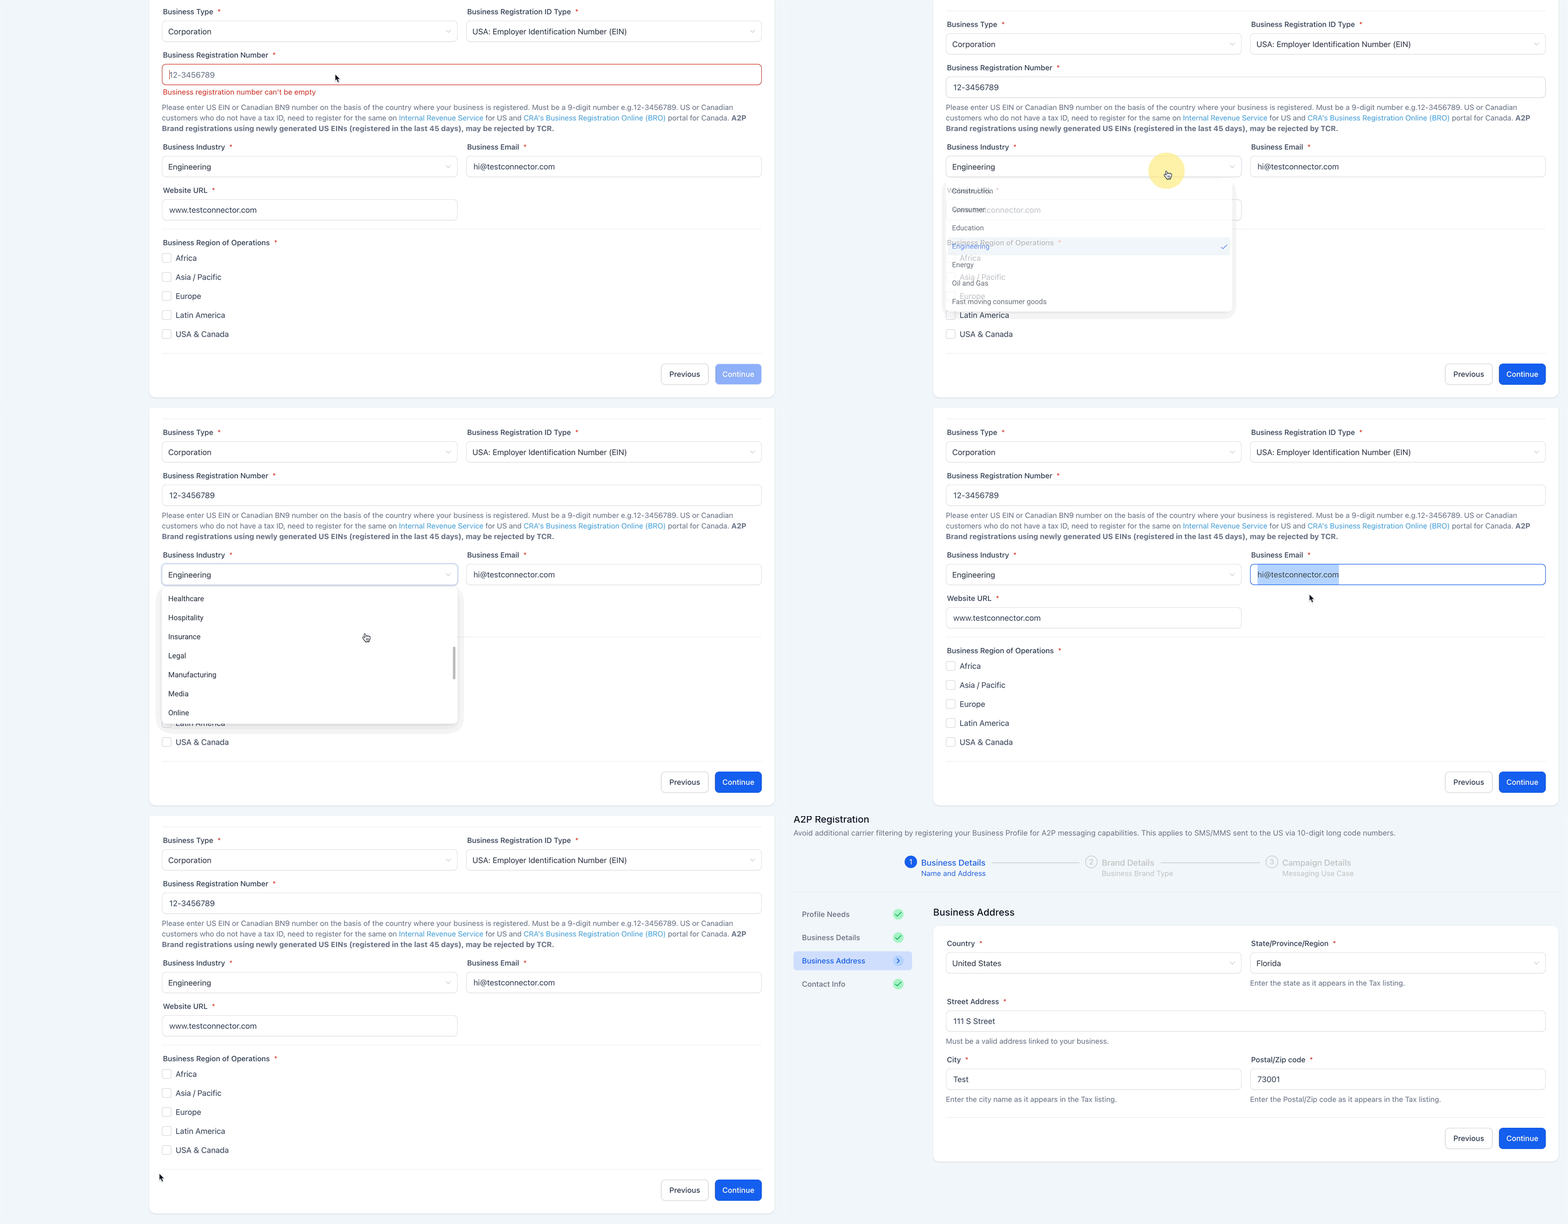
Select your Country from the list.
Select State/Province/Region as it appears in the tax listing.
Add Street Address which must be a valid address linked to your business.
Enter City as it appears in the tax listing.
Enter Postal/Zip Code as it appears in the tax listing.
Click on Continue.
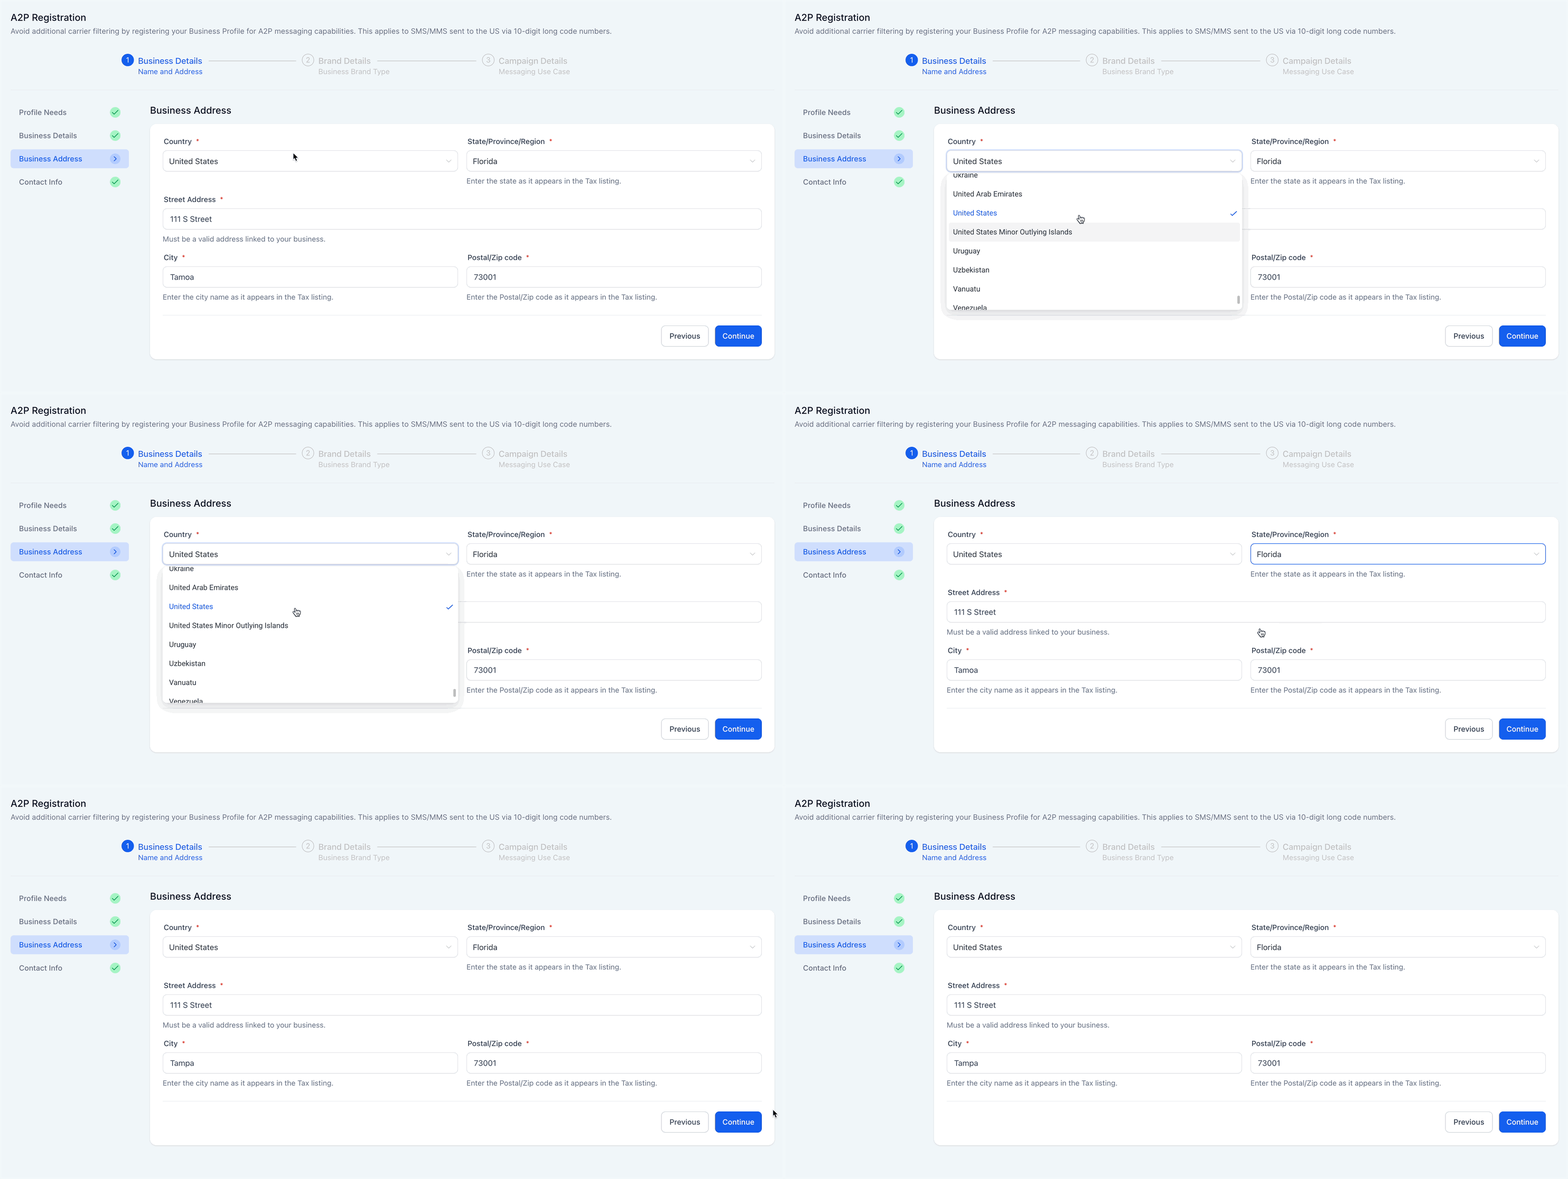
Add your First and Last Name.
Add your Email Address. (Use a business email like hi@yourdomain.com not @gmail or @outlook.com)
Add your Phone number as per your country.
Select Job Position from the list or select Other and add your job position.
Click on Continue.
Once you click "Continue" or submit your contact details, you will now have to validate this through an OTP sent to your email address. It validates each email address by sending a unique 6-digit one-time password to ensure the sender’s identity is genuine.
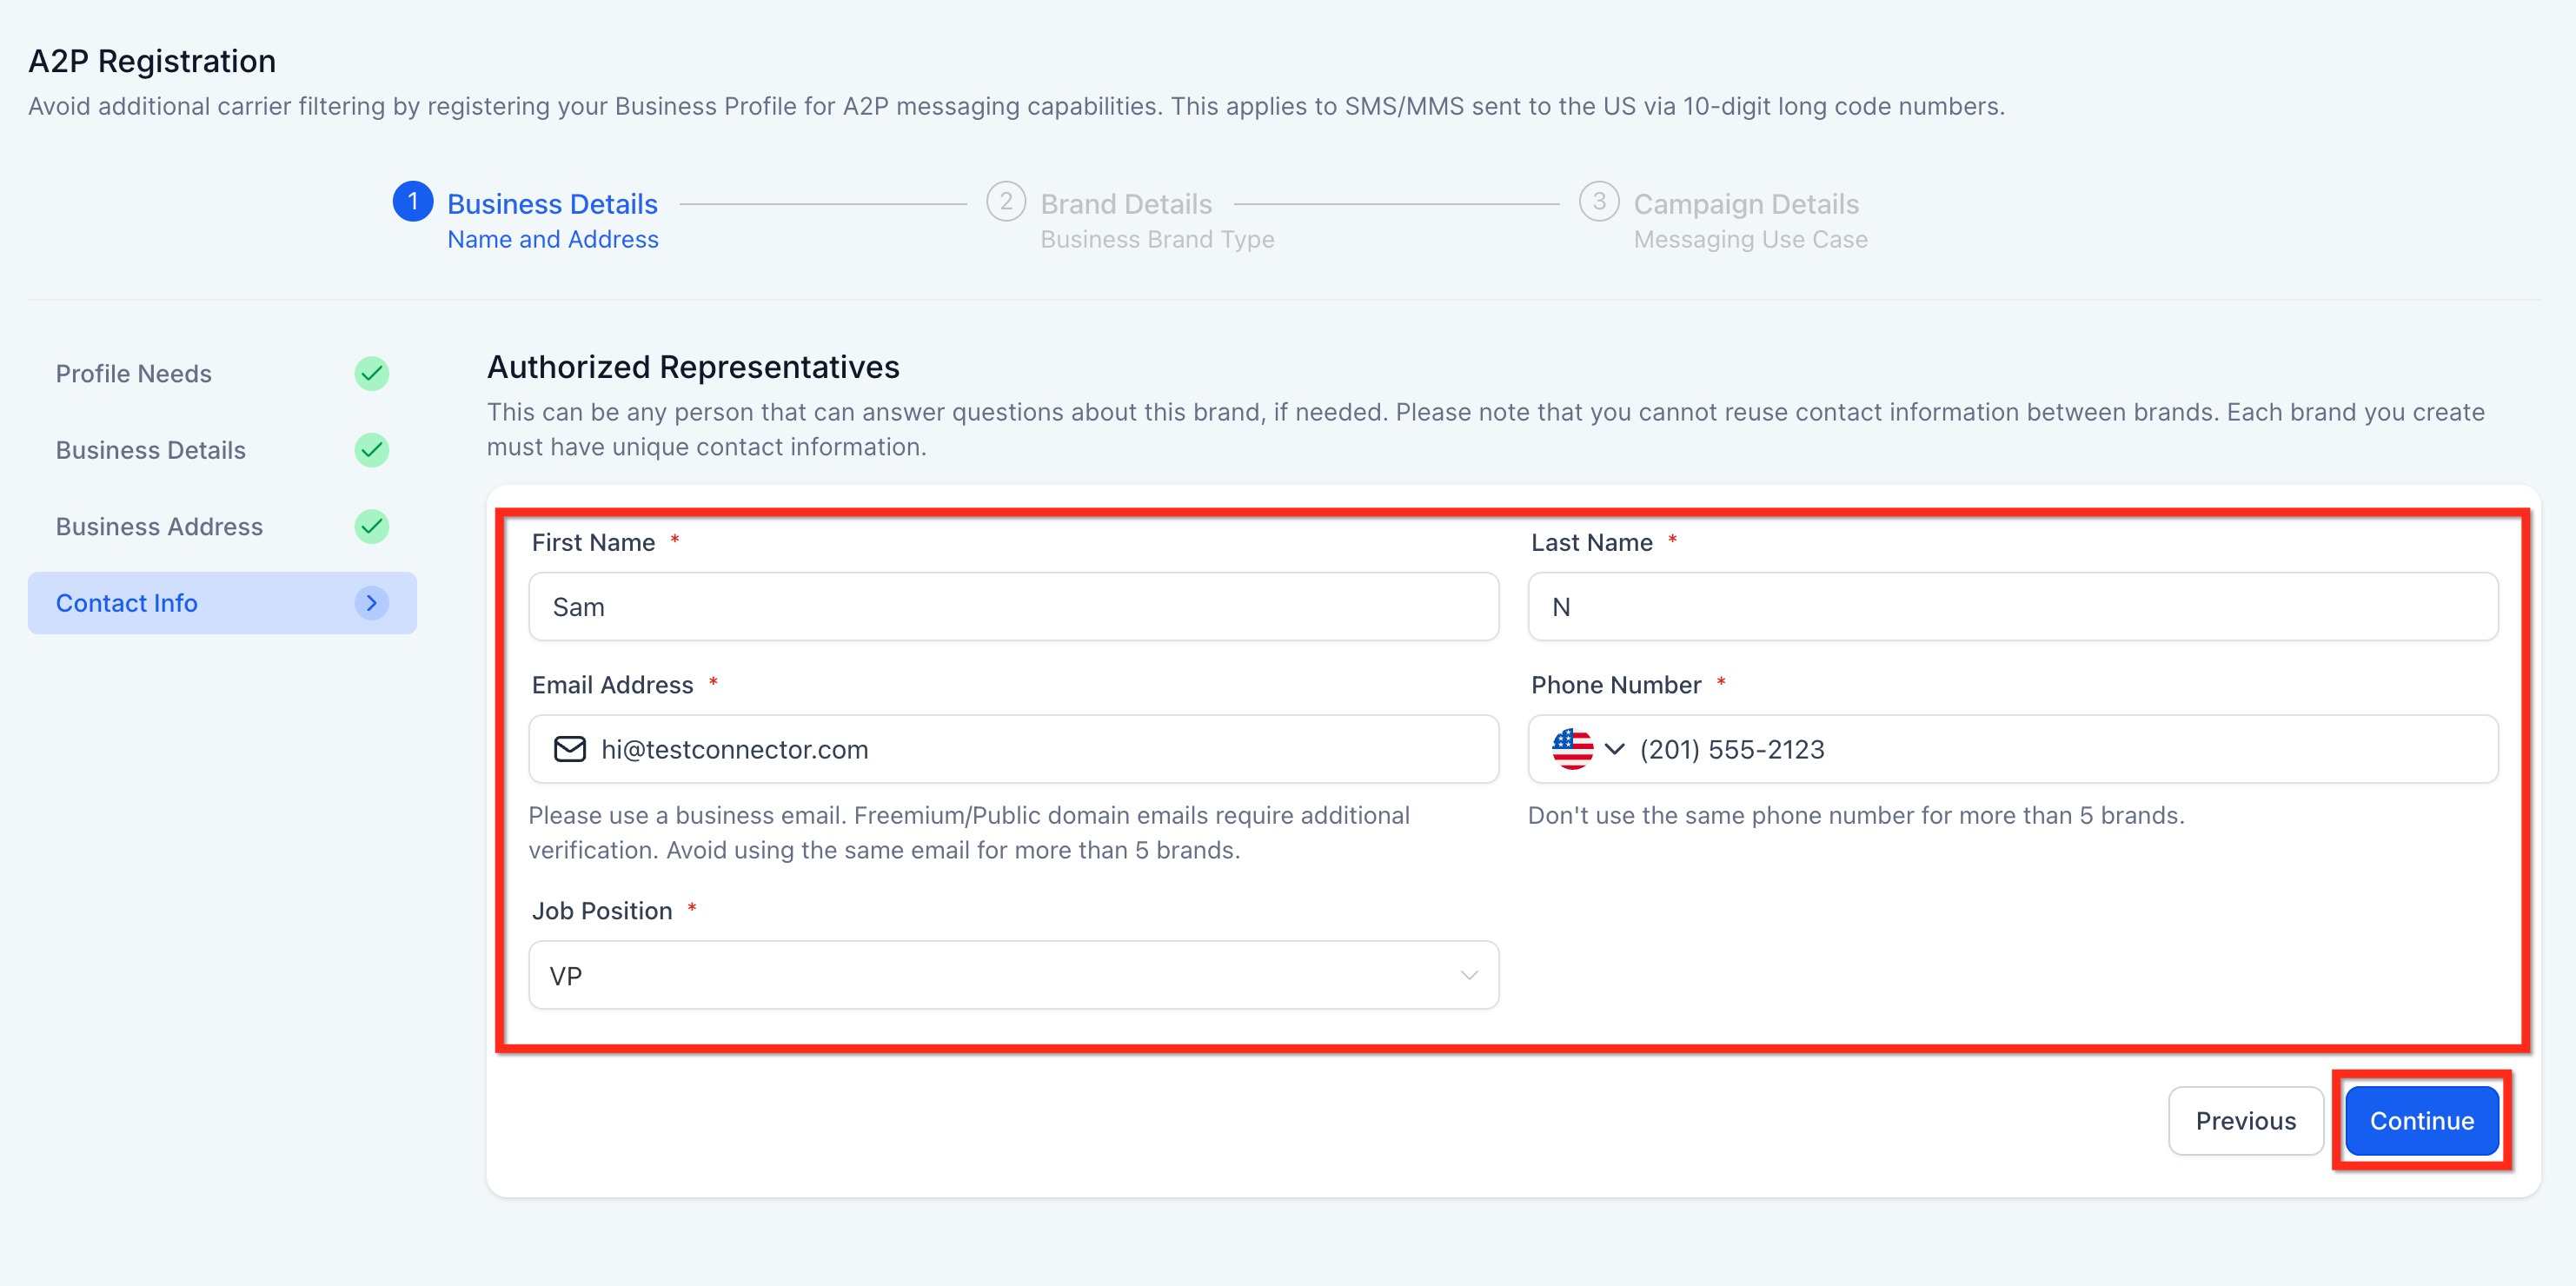
Note: One email can be used for max 5 brands. Please use different email if you have already used the email for more than 5 brands.
Step 6: Choose Your Business Use Case
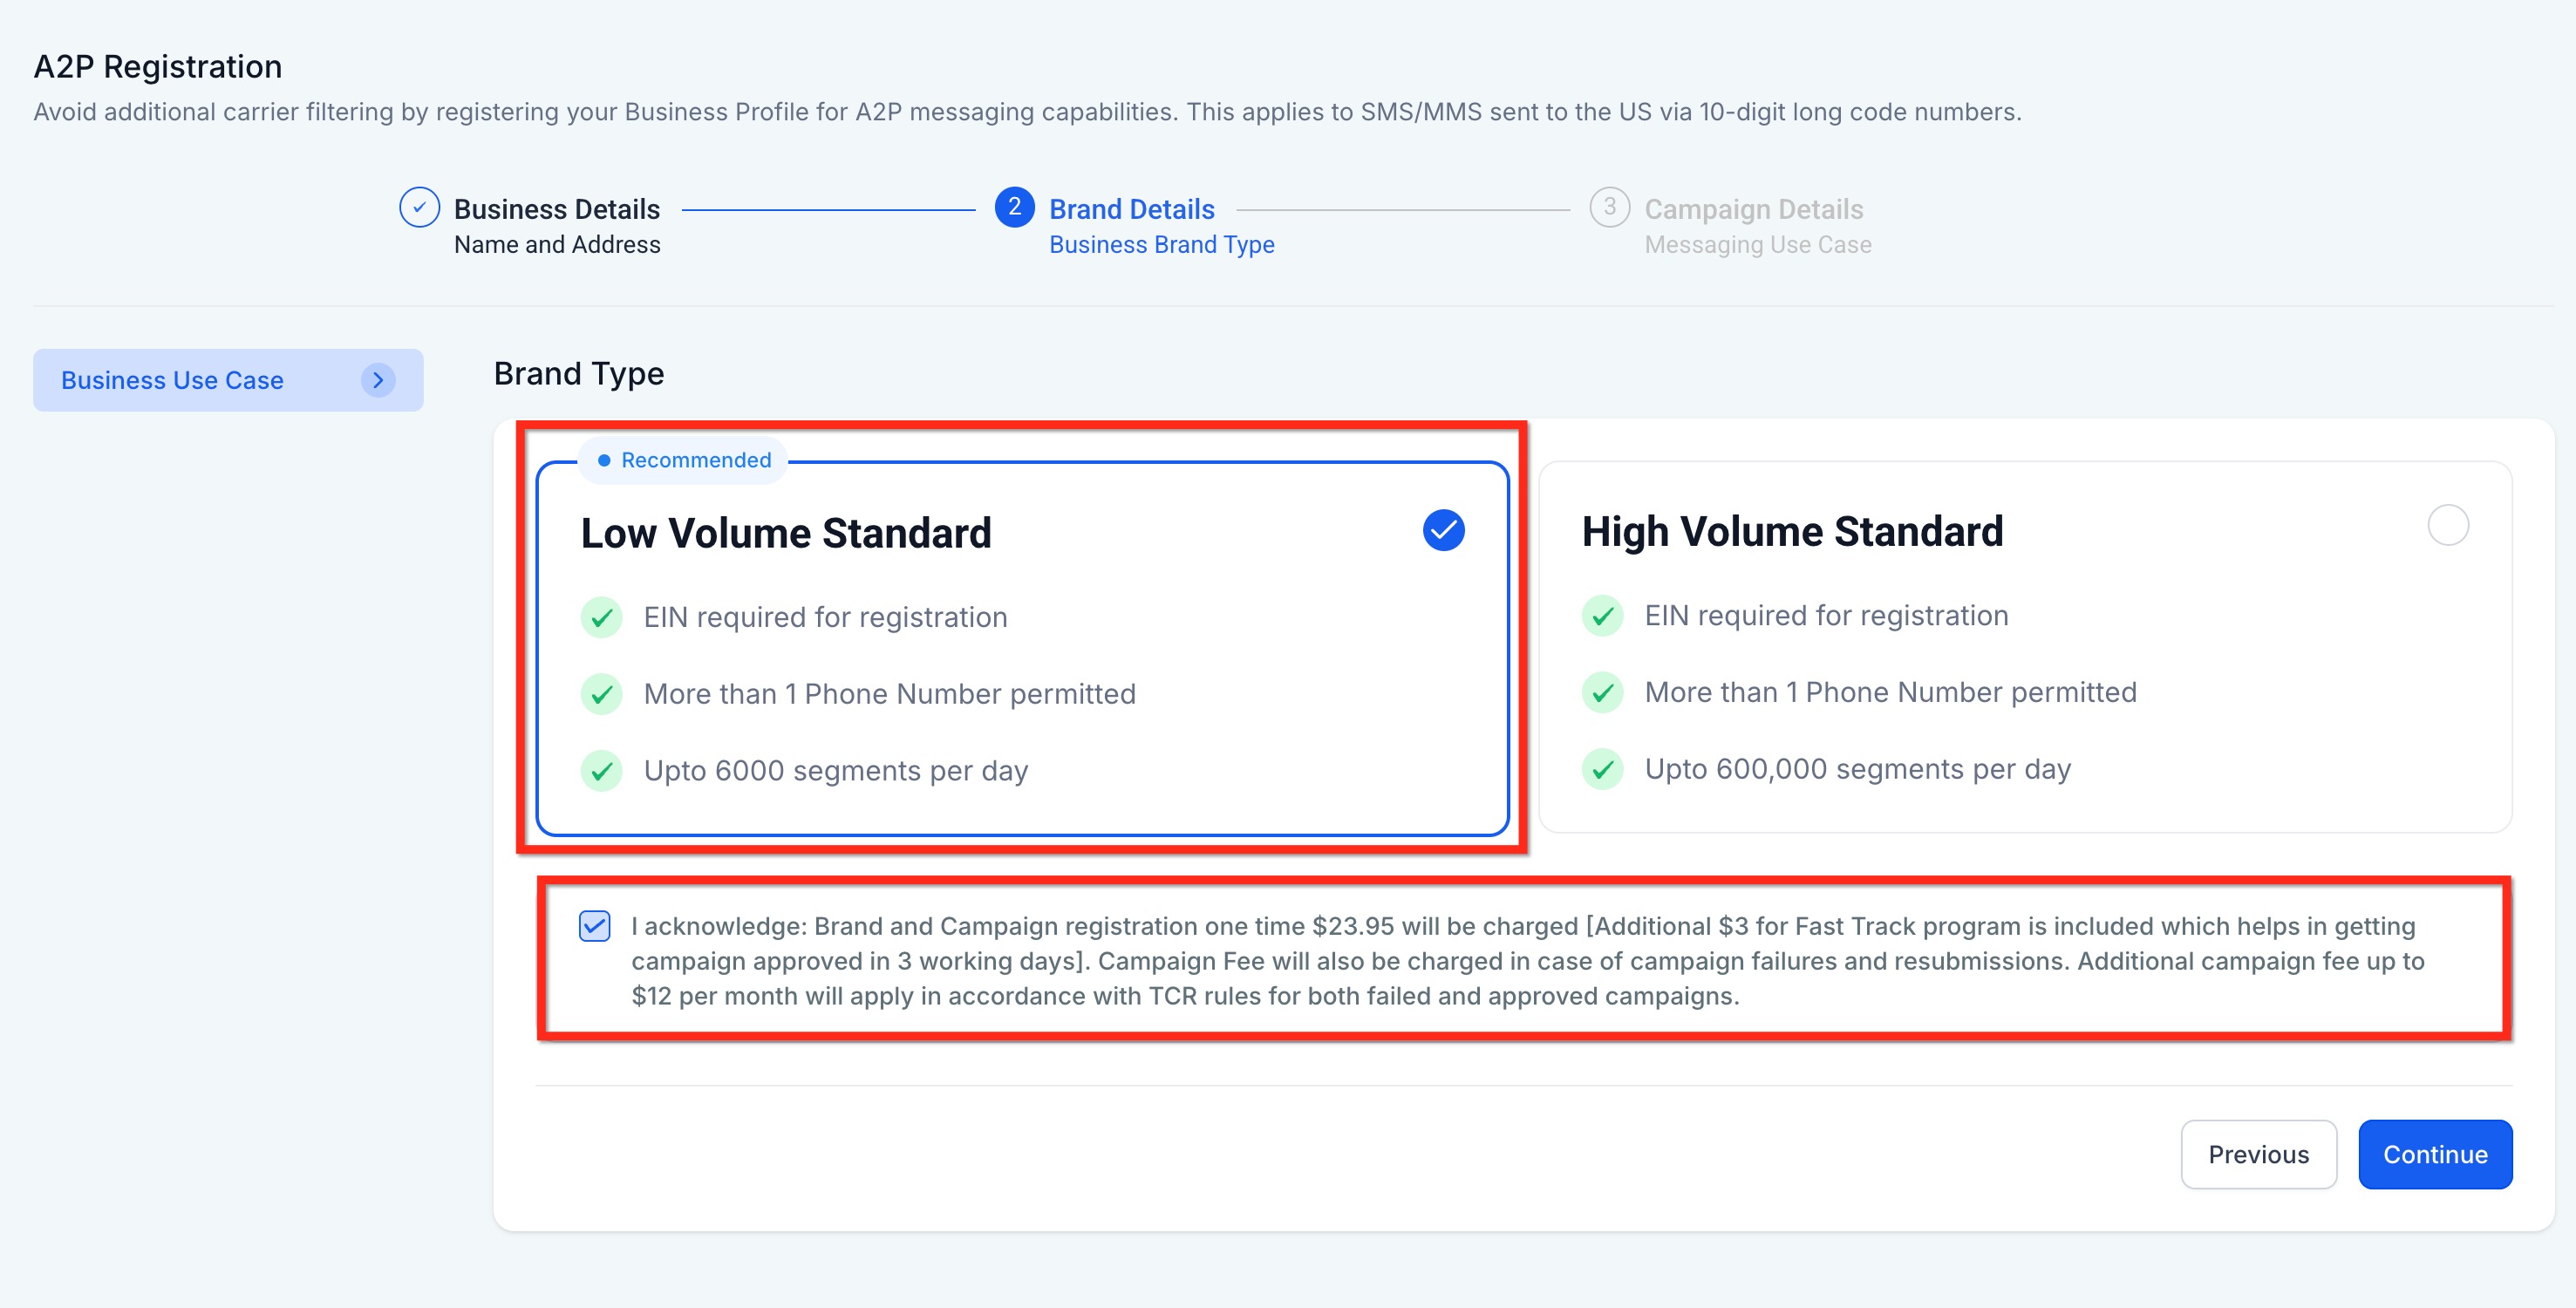
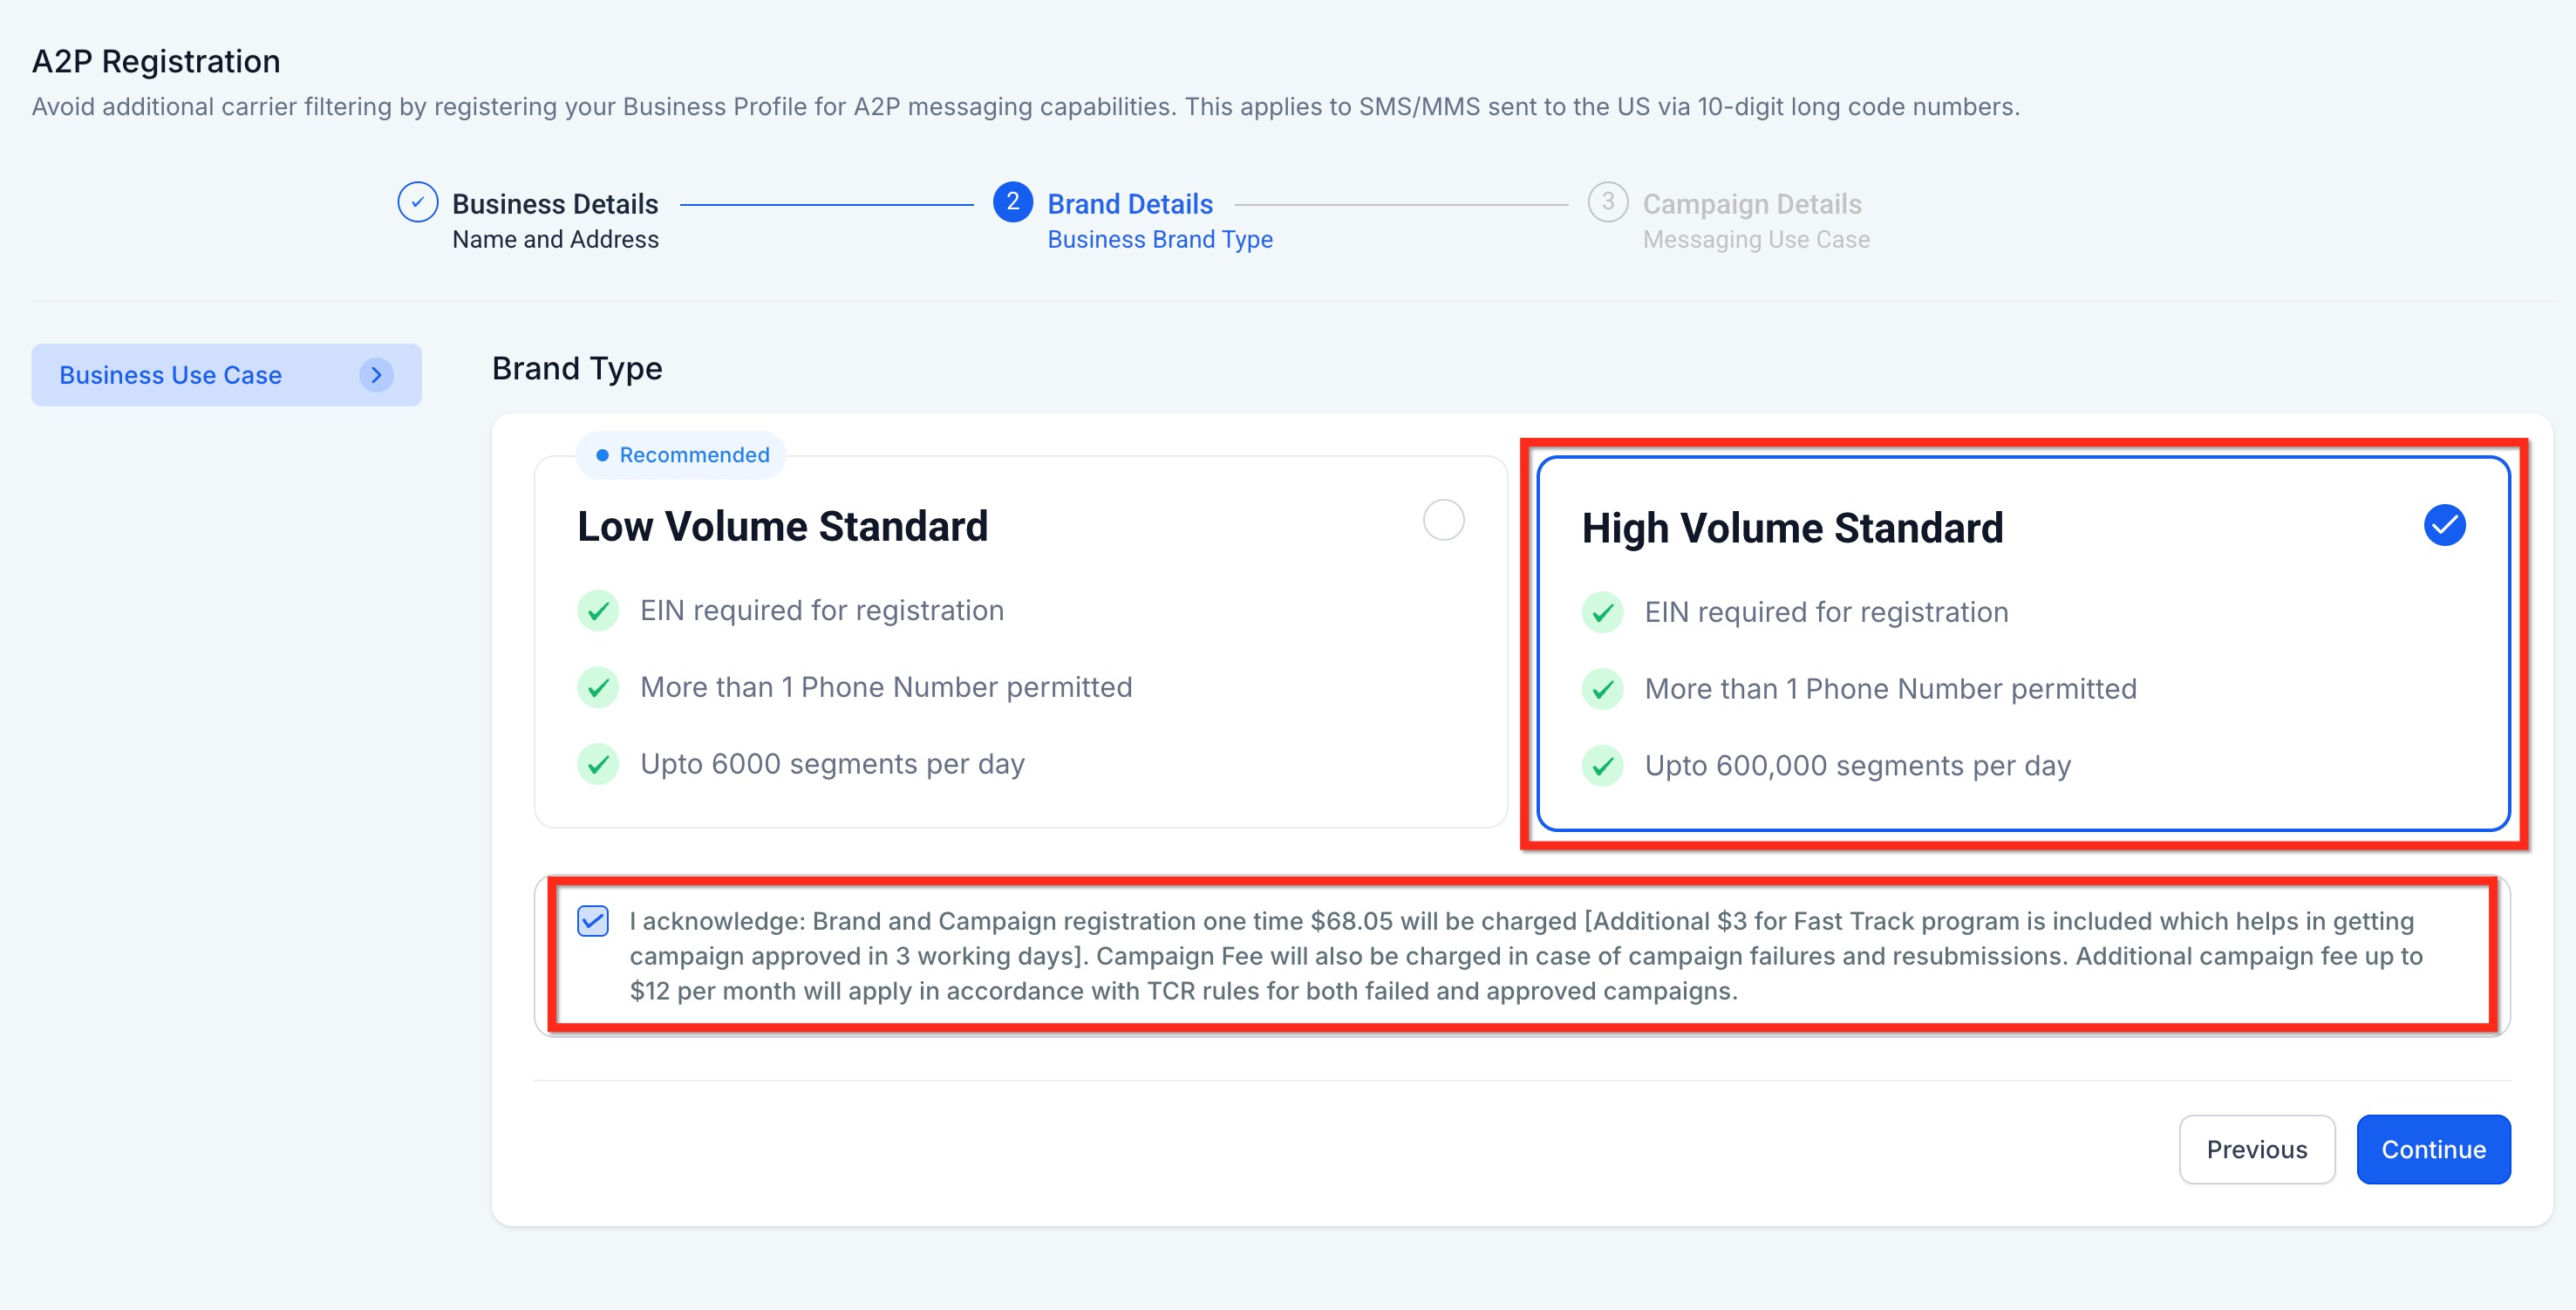
The Business Brand Type will be automatically set to "Low/High Volume Standard" based on the responses provided under Profile Needs. Select the Brand Type as per your need and click on Continue.
Low Volume Standard
It is designed for businesses with a valid EIN that need moderate-scale messaging capabilities using 10DLC.
Requires a valid EIN (Employer Identification Number)
Supports multiple phone numbers
Allows up to 6,000 SMS segments per day
One-time registration fee of $23.95 (includes $3 Fast Track fee for approval within ~3 business days)
Additional monthly campaign fee up to $12/month as per TCR rules
High Volume Standard
It is suited for larger businesses with high messaging needs, offering extensive daily capacity and multiple phone number support.
Requires a valid EIN
Supports multiple phone numbers
Allows up to 600,000 SMS segments per day
One-time registration fee of $68.05 (includes $3 Fast Track fee for approval within ~3 business days)
Additional monthly campaign fee up to $12/month as per TCR rules
Step 7: Add Campaign Details
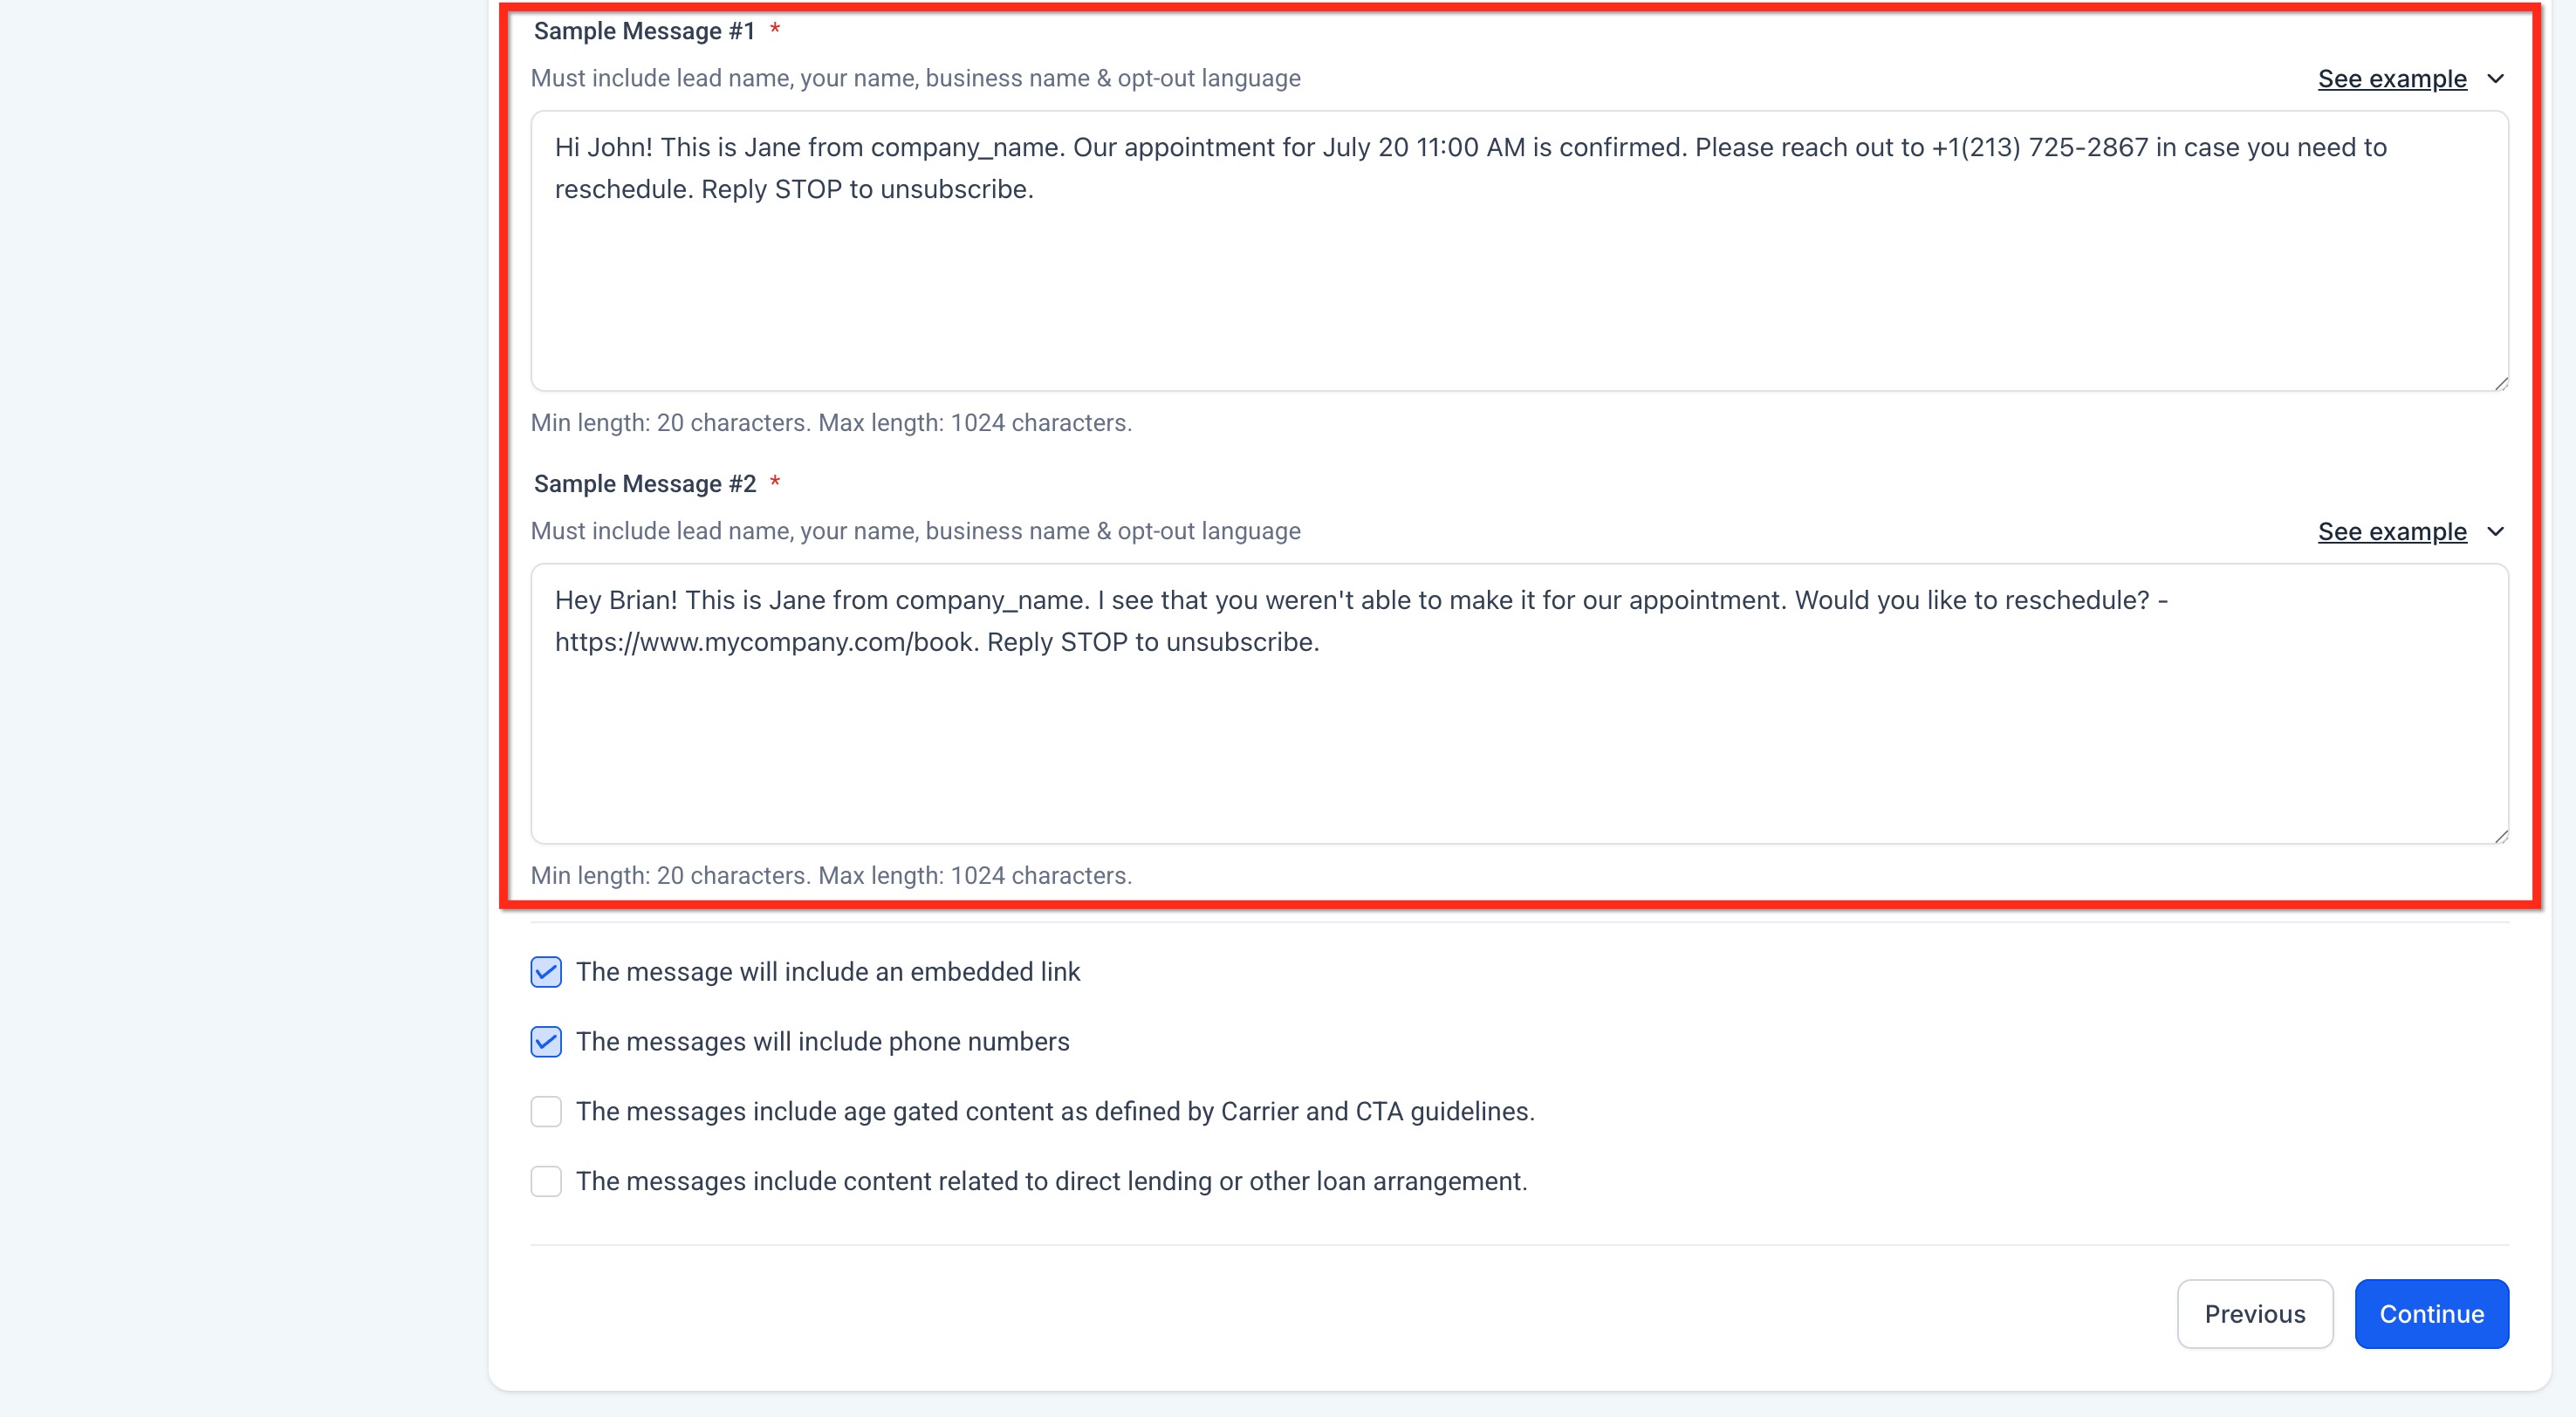
From the Campaign Use Case dropdown, select Low Volume Mixed or Mixed (recommended). You can also select a specific use case as per your need from the list.
In the Use Case Description field, explain what the campaign will be used for.
Example: This campaign sends appointment information - confirmation & reminder messages to customers once they have booked an appointment with company_name on website and opted in to receive promotional and notification SMS from company_name.
Note: If you have an EIN but use a different brand name, include “We are doing DBA as [Business_Name]” in the Campaign Use Case Description. You can register up to 10 brands per EIN.
Step 8: User Consent
To comply with carrier regulations, you’ll need to provide details on how your contacts give consent to receive messages and what your opt-in message looks like. Follow these steps:
Describe the Consent Process:
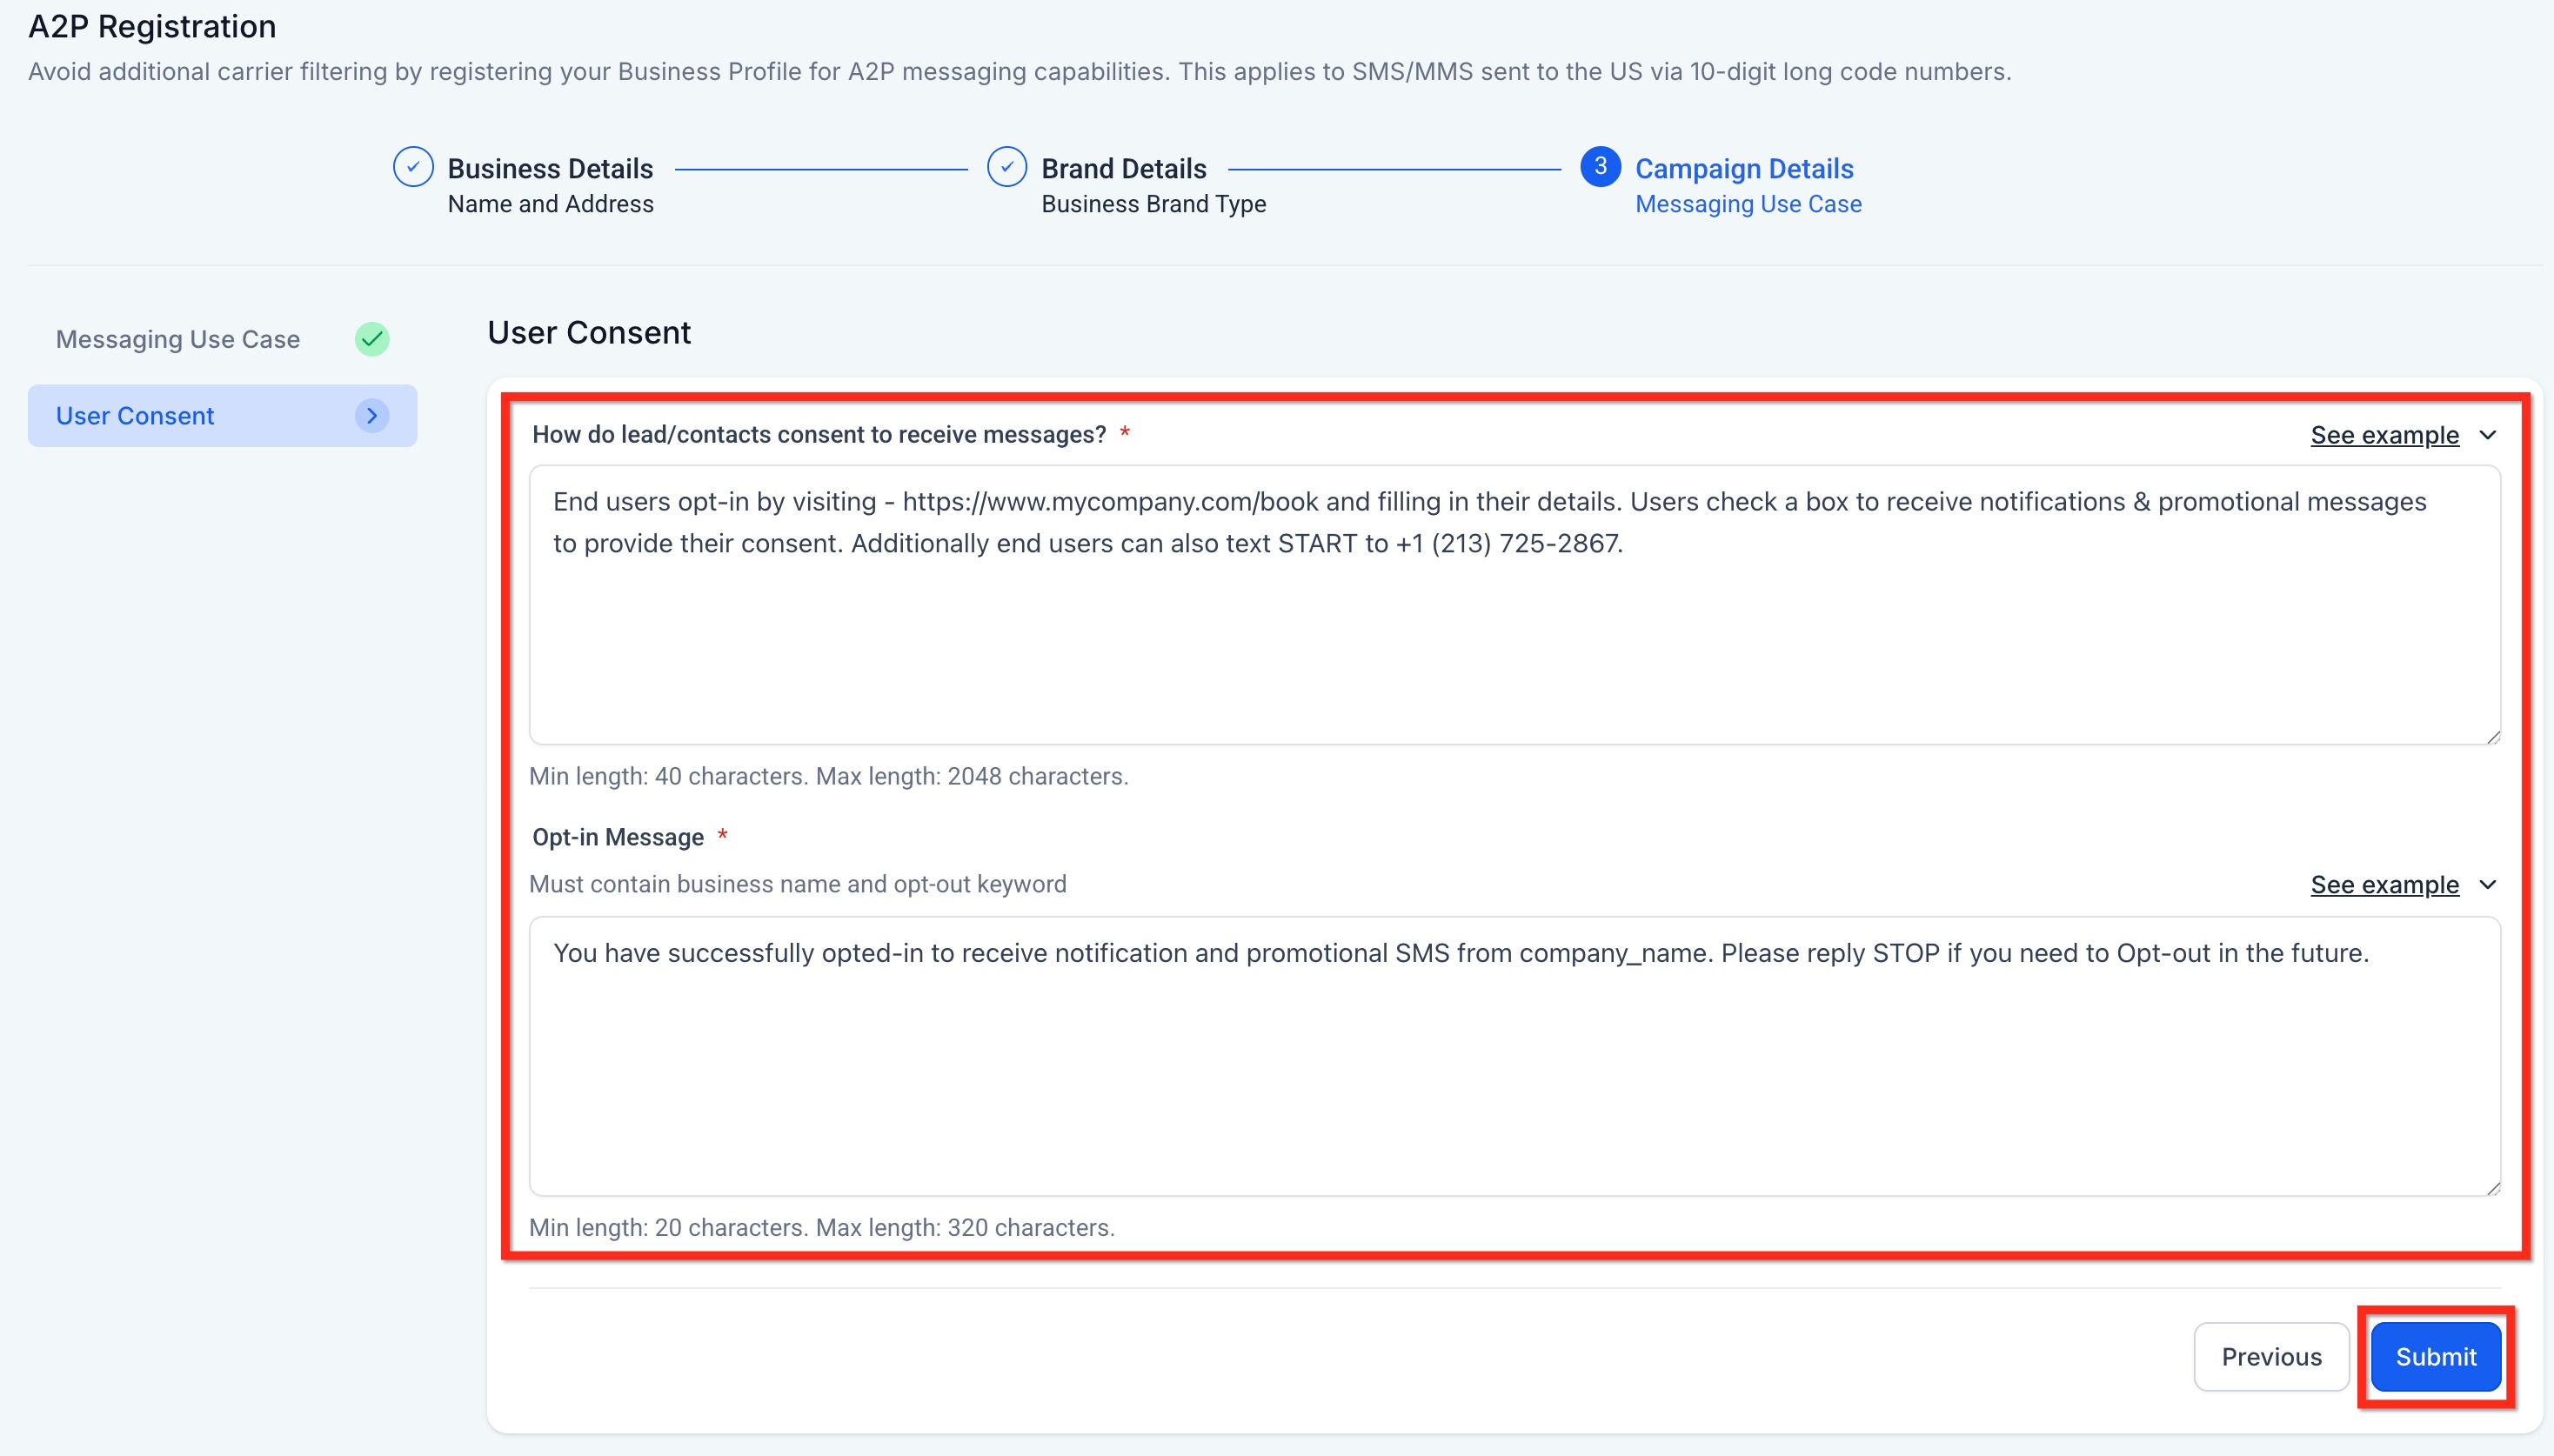
In the "How do lead/contacts consent to receive messages?" field, explain how users opt in.
Be specific about the method (e.g., website form, SMS keyword).
Example: End users opt in by visiting https://www.mycompany.com/book and filling in their details. They check a box to receive notifications and promotional messages. Users can also text START to +1 (213) 725-2867 to provide consent.
Add the Opt-in Confirmation Message
In the "Opt-in Message" field, enter the confirmation message users receive once they’ve opted in.
This message must:
Include your business name.
Include the opt-out keyword like STOP.
Example: You have successfully opted in to receive notifications and promotional SMS from company_name. Reply STOP to unsubscribe.
Click on Submit.
 IMPORTANT NOTE:
Ensure all registration information matches government records exactly.
Non-compliance or errors will result in rejection and additional fees.
Consult a legal professional if unsure about privacy policy, terms of service, or messaging language.
For any issues or questions, contact support at support@loansigningsystem.com.
Step After Brand Approval
After your Brand registration is approved for A2P 10DLC, you must manually register a Campaign linked to that Brand. This is required before you can start sending messages using 10DLC numbers.
Campaign registration does not happen automatically after Brand approval — you need to submit it yourself. Until you complete this step, your 10DLC setup is incomplete, and you won’t be able to send compliant SMS messages.
Campaign Registration Guide Link →